Stern Tie Kludge

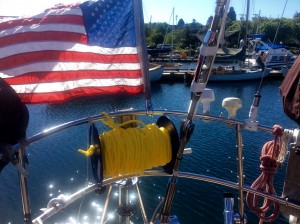
So, cruising in the San Juan’s/British Columbia is going to mean anchoring in a fair amount of smallish coves where we’ll need to tie Charisma’s stern to land to keep her from swinging into the rocks. Today I rigged up a cheap (read: free) reel for the 300 feet of polypropylene line I bought for this purpose. Walked around town until I found an empty spool, then drilled a hole for the handle which I made from some scrap pvc pipe and voila!…our new stern line storage.

Stern line reel

We’re planning to leave Monday or Tuesday pending the weather. We’ll probably head to Friday Harbor and maybe Suicia for some hiking, then after a few days cross into BC at Sidney. I bought my Canadian non-res fishing license today, so we’re ready on the fishing side. Ann’s been waxing and polishing the topsids and stocking up provisions and I’ve been doing some touch up varnishing and now I’m going to empty the lazarette and get it organized.

Getting close!

Another Ugly Project

I’ve been avoiding this one perhaps more than the others I have learned to avoid. But, we have had a persistent and increasing leak in the forward cabin and I can’t put this off any longer. The dreaded handrails.

Doesn’t sound like a big deal. But, the first three connections of the rail to the deck leak and when we’re going kinda upwind – as we’ll be doing a lot of on our trip back to the U.S. we bury the bow into the waves a lot. The result is a lot of solid water going over the forward cabin and – yup, right down the loose bolts on the forward part of the handrail.

What makes this project not fun is that to get at the bolts you have to take down the overhead in the cabin, which means unscrewing about 30 screws, pulling the carefully fitted and varnished wooden battens down, then levering the false ceiling off (complete with multiple brass tacks holding it in place). Looks really pretty when it’s all in place. A big pain the the @ss when it has to come out to get at the bolts.

THEN, you have to go topside and drill out the wooden plugs that hide/protect the bolts that hold the darned thing on. After drilling the plugs out you go back down below and tap out the bolts, except when you tap them with a hammer you hear a funny “tinkle” on the deck. That sound is the top of the bolt falling off. Turns out they rust out, which is why they loosen and leak.
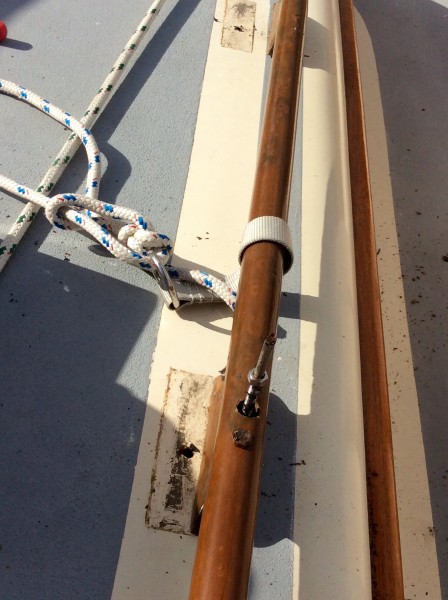
Here's one of the three bolts that broke off.

OK, so there’s lots of other detail about putting it back on like like sanding, taping, cleaning, followed by applying the goo that seals it all back up that I won’t bore you with, dear reader.

Once it’s bolted back down after carefully taping, gluing, etc., then down below to put the overhead back together (i.e. 30 some screws, wooden battens, etc) and finally cleanup of all the fiberglass dust and crap that falls onto the shelves and floor that needs to be swept up.

Tomorrow, epoxy and teak plugs get glued onto the outside bolt holes, then when they are dry I chisel and sand them flush and apply several coats of varnish to seal them.

Then… we’re not done, I get to do the same on the port side!

Oh, boat work is such fun!

Splash Splash (by Ann)

After ten grueling days of work Charisma is back in the water! Amen!

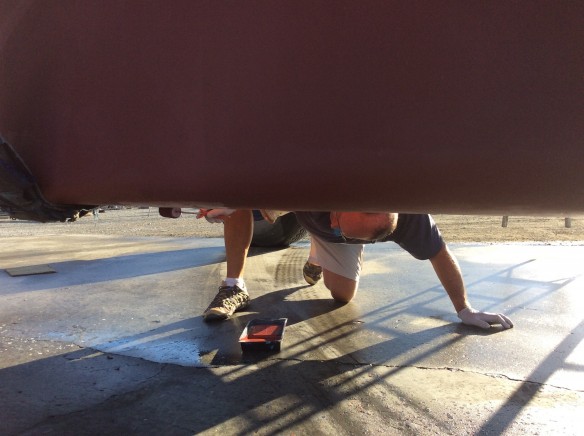
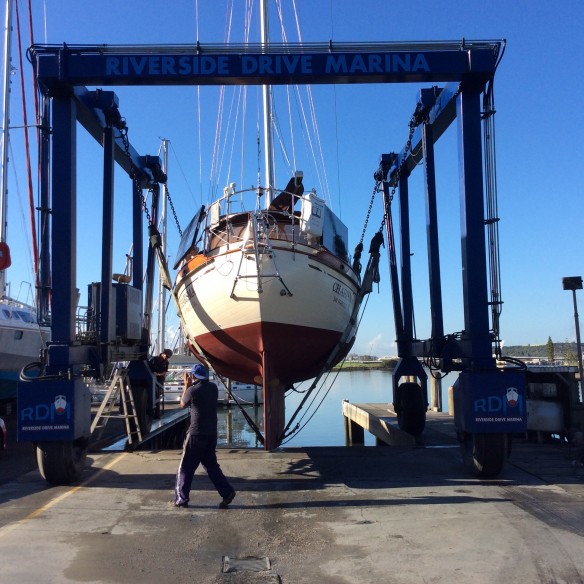
At 9am Karl and Shane , the experts at Riverside Drive Marina, drove the travel lift over to our corner of the boatyard and by 10 am not only had we been lifted out of the cradle but Bob had applied bottom paint to the spots where the keel rested on the cradle and…we were back in our slip.


I guess I did not really believe it would be a 9am lift because as I hurried down the ladder for one last time and saw the slings lift Charisma up

Shane, all around good guy!

I realized I had neglected to move the full coffee pot off of the table. One quick slip while Charisma was being carried across the boatyard to the launching dock and our salon could be full of coffee. Uh oh. Maybe I was just testing Karl’s driving skills. And we are thrilled to report that he is an ace drive and all was well on board.

Karl and Bob relax for a moment. Charisma topped the scales at just over 28,000 pounds! That cannon must weigh a lot!


It was a huge relief to be back in our slip and we are very pleased to have made our best turn around yet…just ten days. Grueling days but a huge sense of satisfaction when it is done.

So we celebrated, taking a day off (minus Bob getting a coat of varnish on the helm). Yep, we played! Lunch in town at our favorite cafe, a quick trip to get food for a birthday BBQ tomorrow for the captain, and even ice cream on the water front. And to make sure we knew how to play we hiked up Parihaka to enjoy the view to the ocean. A stunning day to play!

Of course not everything is done, but the work that required Charisma to be out of the water is complete. She is shiny and beautiful and we are smiling!

On the Hard And Back to Work!

We got the green light at about noon today…time to haul! Deft maneuvering by the captain and Charisma was in the hauling bay and hoisted out. We had errands in town so returned to find Charisma snug in her cradle in the corner of the yard. Our view has changed but is still entertaining as we can watch the entire yard and the driveway. But only for an evening Charisma because tomorrow the real work begins.


Fortunately the bottom paint from last year looks fabulous! Only touch ups are needed. What a welcome surprise.

Bring out the “To Do List” and let the party begin!

Solar Panels

For Alex-who asked how our solar panels are working, I realized we never really showed how we installed them.  So here’s some detailed pics.  The specs are:  Two 130 watt Kyocera panels, wired in parallel to double the power, combined with a Blue Sky “Duo” controller which controls the panels and hydro-electric unit.  The 130 Watt panels are the largest we’ve seen and just fit above the rail in the closed position.  The advantage with this system is that we can angle the panels to the sun.  The advantage to the davit or dodger mount is you don’t have to think about it since it’s fixed, but you don’t always get the optimum angle to the sun and thus a lower charge.  You can see the pole that extends the panels and will extend to 45 degrees and 90 degrees.  I also created a “stub” pole that is about 4 inches long to hold the panels “closed” in a storm.  It worked in 50 knots of wind and 20+ foot seas on our leg from Tonga to NZ although there is always the chance that a rough wave would sneak up inside the panel and break it loose.  Everything’s a compromise   😉

View from "afar" with port panel at 45 degree detent

Here's the starboard panel in the "up" position

Detail of the hinge. I had this custom welded to fit over our lifelines. It's a compromise. If I had the time, I would have exchanged the lifelines around the cockpit for welded steel bars, but I ran out of time and did this instead and attached it to the stern pushpit and first stanchion with dodger mounts.

Counting down the days

We’re about a week and counting.  Trying to leave next Thursday, 10/6 (or so) pending weather, and whether we have all our gear packed, stowed and ready to go.
Been working very hard this week. Ann’s been cleaning and organizing down below in the cabin and I’ve been pulling cables and wire to get the two new solar panels and the 1000 watt voltage inverter running. Long story short, the panels are working (two Kyocera, 130 watt panels wired in parallel to double their amperage), a Blue Sky “duo” regulator (to run the panels and a water generator that we’re waiting for from Hamilton Ferris). Spent waaayyy to long in the Lazarette wiring stuff, but the result is pretty cool. I took us “off the grid” four days ago. The refrigerator runs all night and pulls the batteries down, but the panels, one of which faces the morning sun, power the boat back up and by 9AM, the batteries are completely full again. Really fun to watch how self sufficient we are becoming.
Here’s a couple pics of some of our work including the watermaker and THE LISTS! Everything at this point with only a week left is about lists.
THE LISTS! Watermaker

Counting down the days

We’re about a week and counting.  Trying to leave next Thursday, 10/6 (or so) pending weather, and whether we have all our gear packed, stowed and ready to go. Been working very hard this week. Ann’s been cleaning and organizing down below in the cabin and I’ve been pulling cables and wire to get the two new solar panels and the 1000 watt voltage inverter running. Long story short, the panels are working (two Kyocera, 130 watt panels wired in parallel to double their amperage), a Blue Sky “duo” regulator (to run the panels and a water generator that we’re waiting for from Hamilton Ferris). Spent waaayyy too long in the Lazarette wiring stuff, but the result is pretty cool. I took us “off the grid” four days ago. The refrigerator runs all night and pulls the batteries down, but the panels, one of which faces the morning sun, power the boat back up and by 9AM, the batteries are completely full again. Really fun to watch how self sufficient we are becoming.Here’s a couple pics of some of our work including the watermaker and THE LISTS! Everything at this point with only a week left is about lists.
Watermaker     Everything has to go on a list, or we instantly forget!

Bottom Job

Well, it sounds a bit more “interesting” than the reality.  It’s been 20 months since Charisma was hauled out and the bottom painted.  Last time I noted that the bottom paint had not been stripped in many years and was looking like it needed to be completely removed.  The problem was the price.  A certain boatyard in Alameda that starts with an “S” quoted over $10K to do it.  They didn’t really want to do it and recommended; “go to Mexico and get it done there”.  Hmm.  When I hauled this time at KKMI (a great boatyard) they quoted substantially less to strip all the paint and put on two new epoxy coats and two anti-fouling coats.  They have a technique called soda-blasting.  High pressure baking soda.  Takes offthe paint, but not the gelcoat.  Less damage to the boat means less labor.     Tented and ready to go     In the space-suit     Down to the gel-coat     Polishing the hull  While she was hauled I also spent a “fun” 8 hours polishing the topsides.  Lot of work, but she looks nice! Oh yeah, and as with most projects, there was a surprise.  I’ve had a problem with the raw water pump losing prime when idling for long periods at very low rpm.  The engine guy at KKMI told me he felt the pump was worn out.  “Take it out and show it to me and I’ll tell you”.  So out came the old pump and sure enough, the brass collar around the impeller was worn down and not compressing the blades far enough.  $900 later I had a new pump, which I installed.  Works great.  Lots more water pressure coming out the exhaust too.The old pump  The new paint job has resulted in almost a Knot of boat speed.  I guess the old paint which was peeling and not smooth anymore was slower than I thought!

More Monitor

A continuation of the Monitor testing.  Went sailing (duh) and let the Monitor do all the work.  Spectacular!  I don’t need to sail the boat anymore.  Well…actually I do.  To make any wind vane work effectively you need to carefully balance the boat.   Reminds me of using the autopilot in my airplane.  Once I got it for my plane, I stopped hand flying the plane, but still spent a lot of quality time trimming the plane so it would fly well.  Here’s a couple pics of our new “pilotless” boat. Look, no hands! Autopilot