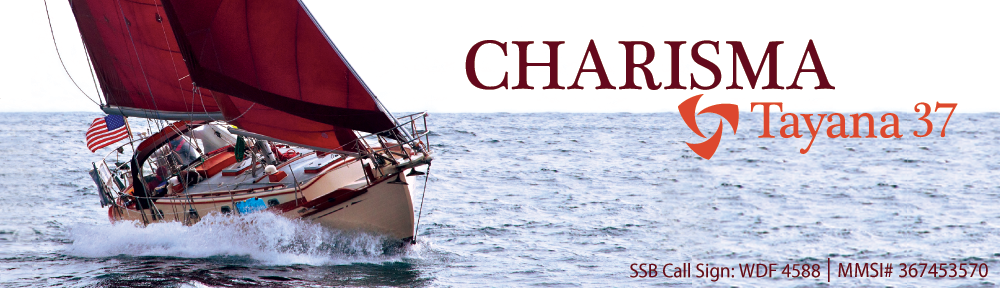
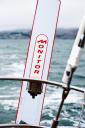
Any project that requires EIGHT holes to be drilled through the hull deserves the term BIG. And so it was that my good friend Jon Eberly and I spent last Sunday installing the new Monitor Wind Vane on Charisma.I have to say that while the project was a bit intimidating, the instructions provided by Monitor are/were excellent. The main thing that made this an all day project instead of just a couple hours was the fact that we checked, double-checked, and triple-checked each and every hole to make sure it didn’t go somewhere it shouldn’t. The total time to hang the vane: about 5 hours. We started at 9:30, with an hour for lunch, and we finished “hanging” the vane at about 3:30. Another hour or so the next day putting the wheel adaptor on, leading the steering lines and attaching a double-turning block to lead them to the wheel and it was done. (OK, it wasn’t quite that easy; I torqued the head off one of the bolts and had to back the stub out of the vane mechanism and put in a new one before we could finish). Here’s a couple pics of us hanging the mechanism and getting it bolted to the boat. The first one shows the use of the spinny pole to help hang it while were squaring it to the boat and drilling the holes. The second shows the final “at the dock” install. 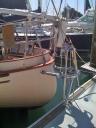
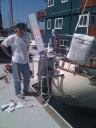 The Monitor install guide has lots of caveats about giving yourself time to learn how to trim the boat correctly to use the vane. They say to give yourself a couple weeks or more to learn how to use it, so I was worried that sailing with it wouldn’t be so easy. However, it worked like a charm first time out. Aim the boat, set the wind-vane, lock the wheel; that’s it! If it’s not exactly going where you want, there’s a fine adjustment where you can rotate the vane (see the picture below) to adjust the final wind angle. Great stuff.

 At the end of the day, the install was easy. Monitor is a great company and very helpful with any questions you might have and very supportive. Best of all; it’s really fun to sail with the vane. You do have to trim the boat properly, but once you do and you set the vane, you now have a whole new sailing experience ahead of you. And you don’t have to worry about amp/hours! Many thanks to Geoff Byrne for many of these pics (he took the good ones). He is an excellent photographer and was gracious enough to let me use his pictures of our first day sailing with the Monitor. If you like great photography, I encourage you to go see his work at www. gmbyrne.com. Thanks Geoff!
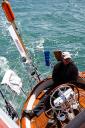
Exhaust Mixer Project
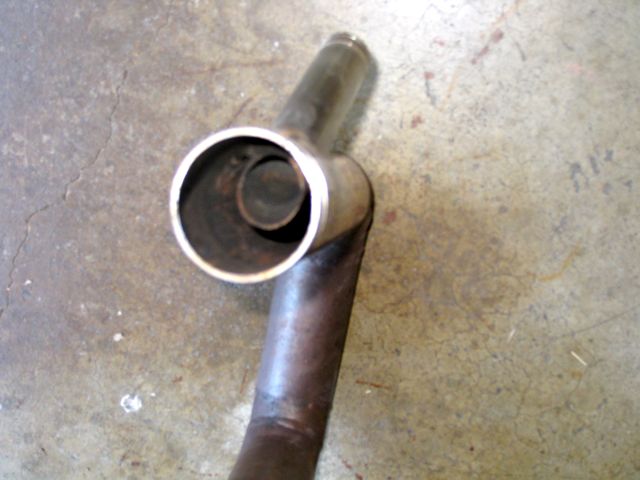
Ah yes the exhaust system; such an exciting project. Well if you’re a boat geek like me it is anyway. So, Charisma had two things going that finally made me tackle this project. One, last time the mechanic worked on the engine, he wrote drastic warnings on the invoice that the exhaust mixer could cause catastrophic issues if it failed and it looked “suspicious”. Ah, oh! Two, after sailing recently, she developed an air lock in the exhaust system and no water was coming out the exhaust. OK, can’t ignore that project anymore. Time to dive in. Here’s a picture of the system before the repair. You can just see some corrosion on the left where the raw cooling water is injected into the exhaust pipe just before it enters the muffler on the bottom of the picture.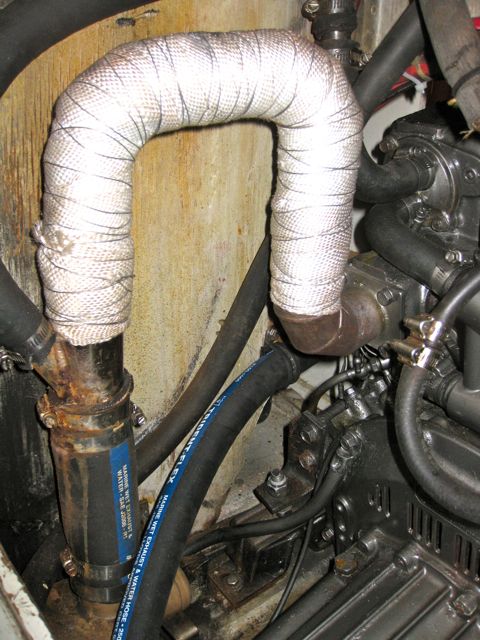 After consulting many websites and a couple friends I determined that the only way I would be able to solve these problems was to just take the darn thing apart and inspect it. That of course is always the easy part. Things always come apart easily (hint, hint!) Even though the hoses looked like they would require a lot of “convincing”, my patented method of hose release (run a “pick” around the hose to break the corrosion/seal) the thing actually came out pretty easily. After about half an hour I had it on deck for inspection. It looked surprisingly good. After I disconnected the short hose from the SS exhaust pipe, I saw that what looked like a potential internal catastrophe was really only a little bit of external corrosion pitting where the hose had leaked a bit over time at the hose clamp. I was able to polish the pitting out and bought some new hose and clamps. The inside of the SS exhaust pipe looked like new, albeit black with a light carbon soot, but no hint of corrosion. Here’s the system broken into it’s component pieces. Also, here’s a picture of the internal section of the system where the raw water injects into the pipe.
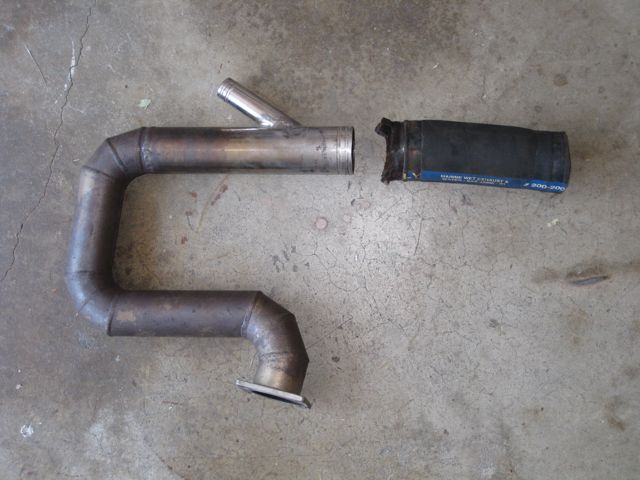
 So, after buying some new hose, new insulating tape and some SS wire to wrap the tape (suitably twisted and secured at each end, aircraft style), I was ready for the re-installation. (Note to self: next time wear long sleeves, long pants and a respirator when handling fiberglass insulation tape. The stuff floats everywhere in the air and itches!) As expected, what comes out never goes back easily. Getting the two bolts on the “far side” of the exhaust flange to go back in, when deep in the lazarette, squeezing my shoulders through the bulkhead and reaching over the transmission was a challenge. After much swearing and a half hour or so of grunting, dripping sweat, using one hand to support my body, the other to turn the bolt and my head strategically pushing the pipe so the flange would seat, the recalcitrant bolts finally succumbed. The rest was just tightening hose clamps to the muffler. But before I put the raw water hose back on the system, I used the dock hose to pressurize the raw water system and hopefully purge the airlock. A faint hope that the cure would be so simple, but worth a try. Took a bit to get the system pressurized but after spraying water all over the lazarette while squeezed cross-legged against the cabin wall, (note to self: wear foul weather gear next time) I finally got water to come out the other side. I actually think there might have been a blockage of some sort that I blew out because after tightening everything down and starting the engine, voila, the system worked and water came out the exhaust as it’s supposed to. Imagine that. A project that actually worked. Just to keep me humble though, the other two projects I was working on refused to comply, so for the weekend, I was only one for three. OK, I’ll take that.
X-Ray Vision For Charisma
Well, almost. Can’t quite see through physical objects, but now we CAN see through the fog. RADAR! (Specifically, it’s the Furuno 1723 C/NT 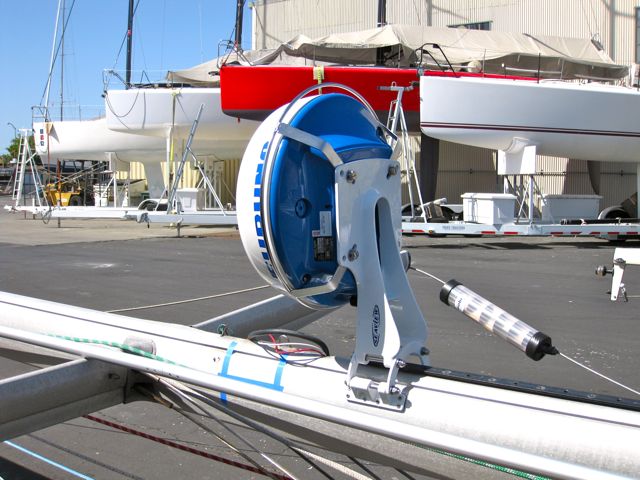 We now have a radar system for Charisma. Also, as long as we made the fairly significant effort to put in the radar, we added GPS and AIS to the mix (all Furuno). The bonus is that all three overlay on a single 7 inch chartplotter display. Very cool to be able to see the GPS depiction of where you are–which we’re all fairly used to at this point–but in addition see an overlay to the chart of where radar says you are along with the “blips” that depict “returns” (boats) moving across the screen. Again, something that’s been around, but only fairly recently available as an integrated image on the same screen (overlay). The new addition though is to have the AIS display showing large ships (generally over 100 tons like ferries, tankers, freighters and the like) along with their name, course, speed, MMIS frequency so you can hail them on VHF by name, and much more. The nice thing about this feature is that it’s broadcast over VHF frequencies, so you can “see” ships 20 or 30 miles away!
  The install was fairly complicated and I’m glad I had it done at a boatyard. Pulling the radar cable down the mast requires the mast to be unstepped. This meant the radar cable had to be cut as the plug wouldn’t fit in the mast conduit and then re-wired via a junction box where 12 very tiny wires had to be connected and again the same 12 wires had to be attached to the plug at the chartplotter end. Not too difficult but tedious and ripe for error. Then a fluxgate compass had to be integrated into the system so the radar/gps/AIS all had the same heading data to ensure correct orientation on the chartplotter overlay. The GPS antenna had to be run and finally an extra “add” was a switch that allows us to determine which GPS information to display at the helm (I left in the “old” Garmin 396 for backup/redundancy). Lastly a VHF splitter so we could run the AIS on the same antenna as the VHF.The tough part of the whole set-up turned out to be the fact that the 7″ Furuno only has three ports. One was used for the fluxgate compass input. One for the data out to the B&G system at the helm. One left to combine the GPS and AIS input. Problem is both of the latter two have different data transfer speeds, so integration is tricky. In fact, we first tried a non-Furuno AIS because it was less expensive. Wouldn’t work, so we had to opt for the more expensive Furuno proprietary solution. As a side-note for the techies who might read this: I think it could have been “forced” to work, but it would have required dropping the baud rate on the AIS from 38,000 to 4,800 to “match” that of the GPS. A big data transfer penalty.All the work done by KKMI in Richmond, California. I have to give them huge kudos. Very responsive. Highest integrity and great to work with. Also very proactive. When a problem arose (the AIS integration issue), they were very quick to identify and solve. Huge difference over other yards I’ve worked with and I highly recommend them. They gave a detailed estimate up front and invoicing was comprehensive and accurate. Now I just have to learn how to use the damn thing. Just look at all the new buttons to learn!
To the Farallones (and back)
I wasn’t sure if Saturday would be the right day to single-hand to the Farallones or not. Forecast was for 15-25 with gusts to 30 knots and 6-9 foot waves. Since several sailboats have been lost out there in the past year, I wanted to be careful. But Charisma is not “some boats”. She did an amazing job. The actual conditions turned out to be 25-28 with gusts to 35 knots. I was thinking that it’s been a while since I’ve felt that 25 knots of wind was “calm”, but that’s what it felt like. Waves were about as advertised. 6 feet or so, with the occasional 10 footer. However, with a single reef in the main and the stays’l (jib furled) we made 5+ knots upwind and actually had a nice ride out. With that configuration in the wind and waves, we were also able to tack in about 90, maybe 95 degrees, which was surprising to me. I would have thought we’d have a harder time going upwind. Quite a boat.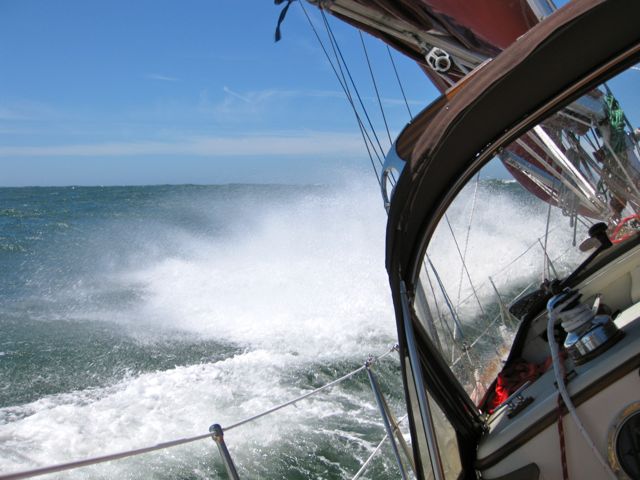 The trip out started pretty calm. You can see in the photo going under the gate (around 10AM) that there was little wind, but since the buoy reports were showing a blow just out the gate, I motor sailed with the main already reefed so I could get out since there was a full on flood tide. I wanted to sail, not tack back and forth trying to get outside. Sure enough, by Pt Bonita the wind picked up, engine off and within half an hour the jib was furled and we smashed the 20 miles out.
 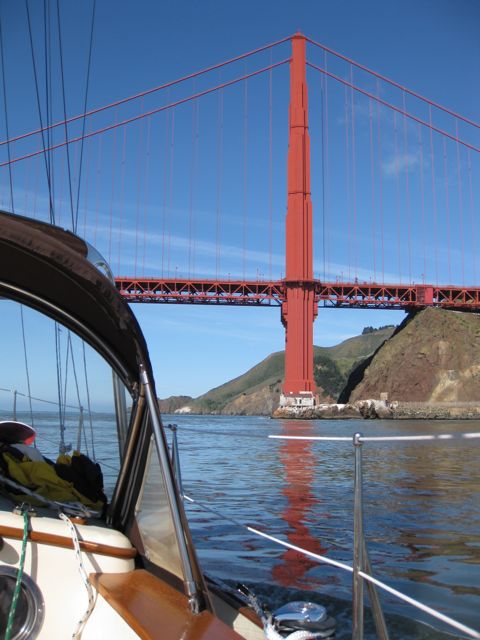 Didn’t see another boat all day. I think everyone else decided not to venture out. Charisma was really pretty exceptional. Even though we “flew” pretty high over a couple waves, she didn’t slam once like I’ve felt in other boats in similar conditions. One thing that did surprise me was that when wind and waves pick up you have to drop the main traveller and let the stays’l out further than you would when you’re using the jib. But even with the sails “sheeted out” a bit, she still seemed to point as high. Probably making less leeway that when trying to point higher with the jib up. One fun point in the trip was crossing the “line” from green water to blue. At about 9 miles out, there’s literally a line in the water. One side is green from the coastal influence and the other is blue. No mixing, just an abrupt change. The prep list for the day; jacklines rigged, cowl vents turned backwards, harness with tether and full foulies and seaboots on before going under the bridge. Didn’t want to have to leave the helm, although even in those conditions, she did steer upwind by herself quite nicely and I ended up going to the foredeck a couple times to clear lines and even a trip below to the head with Charisma happily steering over the waves. Downwind is another issue and almost impossible to leave the helm for more than a few seconds when in waves.
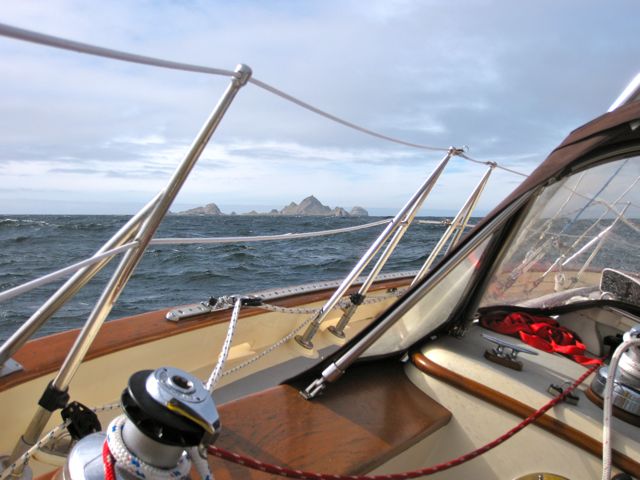 All in all a great day. Even hit 9.5 knots coming back. Who says Tayanas can’t surf?
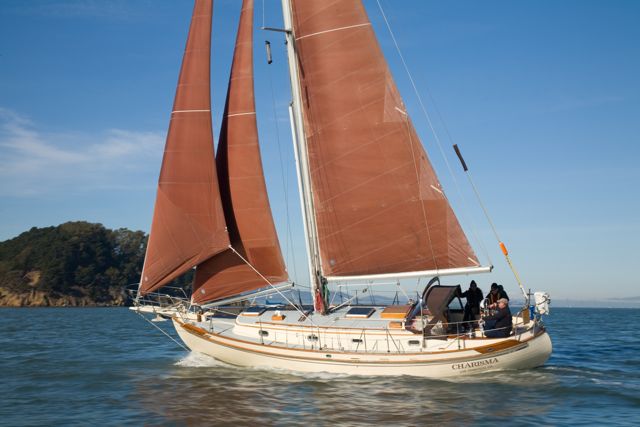
Some New Pics
Short post today. Just a couple new pics from Peter Lyons (www.lyonsimaging.com) taken in January over by Tiburon. 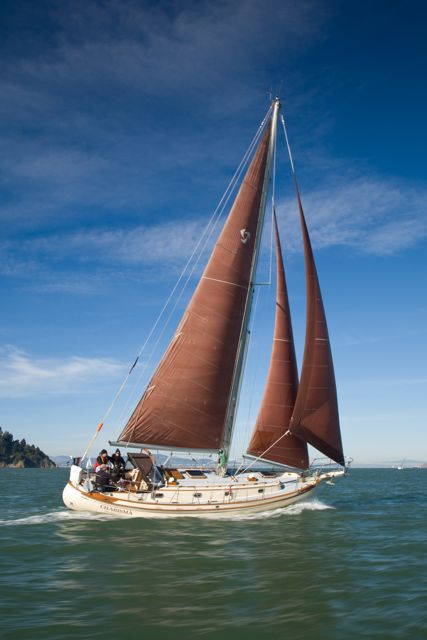
Up the Mast and Back Up the Mast
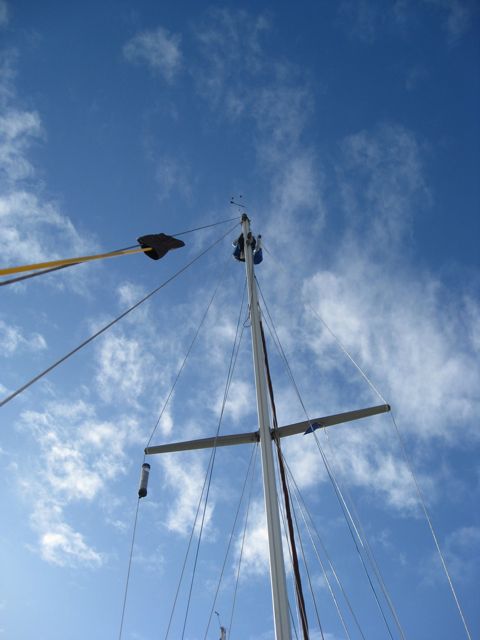
Bob sent me up the mast to fix the anchor light and the deck light. Unfortunately, the first time I went up, the safety knot in the halyard was in the wrong spot and I couldn’t get close enough to the masthead light. So down I went with an unsuccessful stop at the deck light (the new bulb didn’t fit) and back up I went to work on the anchor light. Of course, while I was up there, the cold south wind started blowing. Thanks to last year’s Christmas present from Jon & Heather (my own super deluxe climbing harness) and Bob’s handiwork at the winch, I have now safely summitted the mast five times. 

More Maintenance
The Fall (’08) maintenance schedule included replacing the two hatches, rehabilitating the hatch screens and keeping up with the brightwork. First the brightwork: The teak on Charisma is finished with Cetol, a semi-transparent coating similar to varnish. It’s more durable than varnish and easier to work with, but still needs maintenance. I’m finding out the hard way that when it goes, it goes fast. A fair amount suddenly started to peel this Summer. I got behind on it (preferring sailing to working) and now I’m having to strip some areas and completely refinish. The “eyebrow” trim on the cabin, all four dorade boxes, the companionway hatch cover, boom gallows and the forward hatch covers all needed the full treatment. This meant; tape the area off, strip (I used paint remover; oops. More on that below), sand, scrub with teak cleaner and then four coats of new Cetol. I used Te-Ka, a two part teak cleaner. Amazing stuff, but scary. Part one will stain anything including fiberglass. Part two is used to deactivate the agent in part one and lifts the dirt. Make sure everything is very wet when you use it and follow instructions carefully. I was able to Cetol the cockpit in time before it got too bad as well as the rails, but the Port side is suffering somewhat more (it faces the sun) and won’t look as good. I don’t want to refinish that until we’re in the boat yard at some future point since it’s awkward to reach while Charisma’s in the water. The good news is that if you get to the Cetol finish in time, it only needs one coat for maintenance and not sanding involved. Just dull it a bit with a scrubbing pad, wipe with Acetone and brush on a new outside coat. The bad news is; don’t ever, ever, use regular paint remover anywhere near fiberglass. It melts the gel coat off. Fortunately, I had taped off all the areas I was working on in case of mishaps, but there are a few small areas where the stripper went through the tape. Gel coat repair is going to be the next thing I’m going to be learning how to do (very minor, but I notice it). The one boo-boo was trying to sneak a last series of touch up coats of Cetol when I knew the fog was going to come in. I was hoping that it would dry enough before the fog actually made it to the boat. But when I came down the next day, I saw that the Cetol had “bubbled” where dew had gathered and sat on the deck. Given a week with better weather, the bubbles have gone away, but the area is “dull”, so I’m going to have to scrub it and give it a final gloss coat when it’s warm enough.  The new hatches. Shana and I gave each other a hatch cover for Christmas presents last year because the hatches leak when it rains. The originals are twenty years old and Lewmar no longer makes replacement parts for them, so new ones it was. Really nice “Ocean” series hatches. It’s so nice to be able to see through them now, but like everything else, it’s a time-consuming job. First remove. I thought that would be the hard part, but the old ones actually came off pretty easily. Then clean. A lot of old adhesive to clean up. Then tape, strip and sand and refinish the teak coaming that the hatches mount onto. Four coats of Cetol with 24 hours in between each coat means that this is automatically a week long job. Putting the hatch on means adding caulk (3M, 4000) which always makes a huge mess even with adhesive cleaner and the aforementioned tape on everything. But it sure is nice to hatches that; don’t leak, stay open where you put them and I like the new feature that lets you lock them open one inch, to help with ventilation.
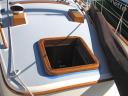
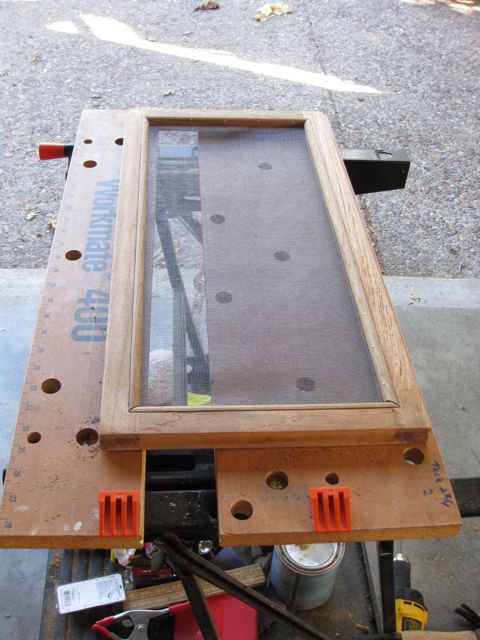
 The Tedious Stuff. As long as I was putting in the new hatches, Shana felt it was time to rehab the hatch screens which were torn, old and their frames were suffering from the hatch leaks (I was trying to ignore them knowing they would be a pain to fix). This meant taking them home, prying off the quarter round trim (which broke) and then stripping, sanding, etc the two frames that hold the screen (each is 2’x1′). Then off to the boat store for new screen, brass tacks and new teak quarter round. I was going to use brass screen, but ended up getting a fiberglass screen. It looks just like the old screen and is easy to work with. I just finished putting them back together and they look pretty good (picture below). As long as I was working on the screens, I figured this would be a good time to refinish the dorades. They were peeling pretty badly and I figured that it would be easiest and best to just bring them home and completely redo them. So, stripping, sanding…you know the drill, but I have to say they are going to look good. So, that’s certainly one thing about boats: they make you learn lots of new skills as well as how to work with toxic chemicals!
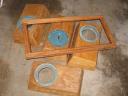
Cowl Vent
Here’s a picture of the cowl vents. We lost one and need a new one, so we don’t have to replace all four. 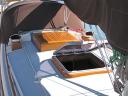
Fleet Week On SF Bay
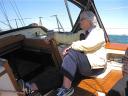
Went sailing on Saturday with Mom and Dad and the Blue Angels. It was Fleet Week. Last year we anchored off Angel Island and watched from fairly far away. This year we were right in the action. The Blue Angels were thundering only 100 feet or so above our mast. Quite a site. Gorgeous day. Dad sailed the whole day. I don’t think I got to touch the helm. Great fun! Time for a cocktail afterward too. Nice. 


My First Year On Charisma
Doesn’t seem possible it’s been a year already since I acquired Charisma! In fact, according to the log book, the first sail was on Sept 1st, 2007. Wow, what a year. Lots of day sails, some great overnights, several fish caught and of course the “epic” Santa Barbara trip in May. For 2009, I hope we’ll get some more coastal cruising (Drakes Bay, Santa Cruz, Half Moon Bay?). Today, I went for a single handed sail on Charisma. Gorgeous day on the Bay. Saw the ridiculously large Maltese Falcon. What a joke that someone feels they need to build a private yacht the size of that thing. See for yourself how big it is.