
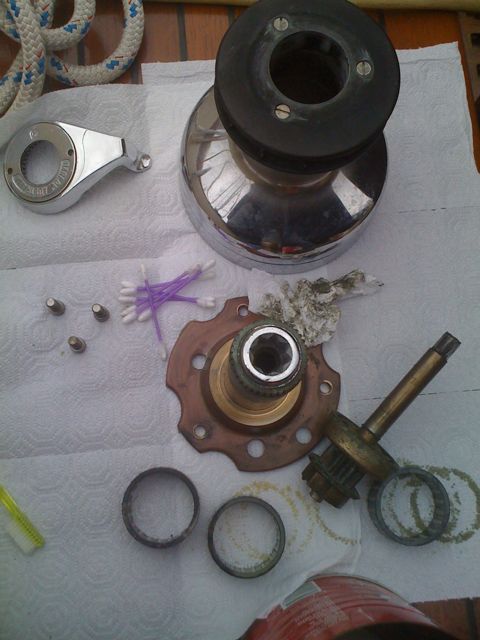
Kinda boring compared to sailing across the Atlantic and Equator, I spent Sunday on winch maintenance. Since it was getting ready to rain, I couldn’t do any more varnishing, so tear down the winches it was. I actually haven’t done that in the two years I’ve had Charisma. I’ve only pulled the drums and greased the bearings. But, the large, two-speed main winches have been complaining recently (squealing noises), so time to go all the way. I took pictures as I was removing stuff in the fear I’d never get it all back together. Lots of gears of different sizes, each of which has a bearing and shaft as well as the main bearings, pawls, springs, etc. Took about three hours to do one winch. Had to soak each part in solvent and then brush with a toothbrush to get rid of the old, caked on and hardened grease. Oh boy, lot’s of fun. 
Category Archives: Maintenence
Exhaust Mixer Project
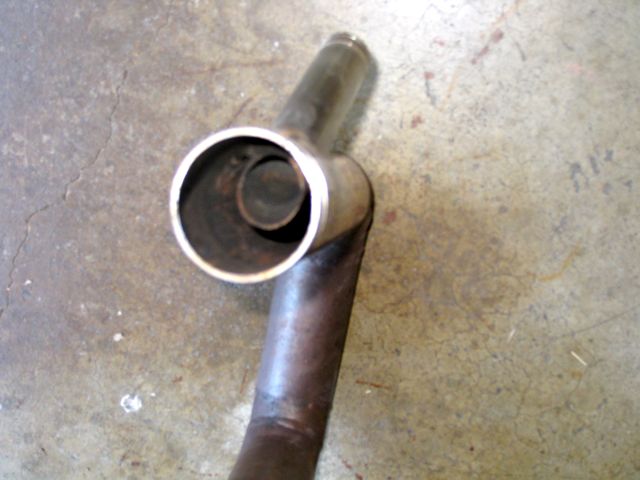
Ah yes the exhaust system; such an exciting project. Well if you’re a boat geek like me it is anyway. So, Charisma had two things going that finally made me tackle this project. One, last time the mechanic worked on the engine, he wrote drastic warnings on the invoice that the exhaust mixer could cause catastrophic issues if it failed and it looked “suspicious”. Ah, oh! Two, after sailing recently, she developed an air lock in the exhaust system and no water was coming out the exhaust. OK, can’t ignore that project anymore. Time to dive in. Here’s a picture of the system before the repair. You can just see some corrosion on the left where the raw cooling water is injected into the exhaust pipe just before it enters the muffler on the bottom of the picture.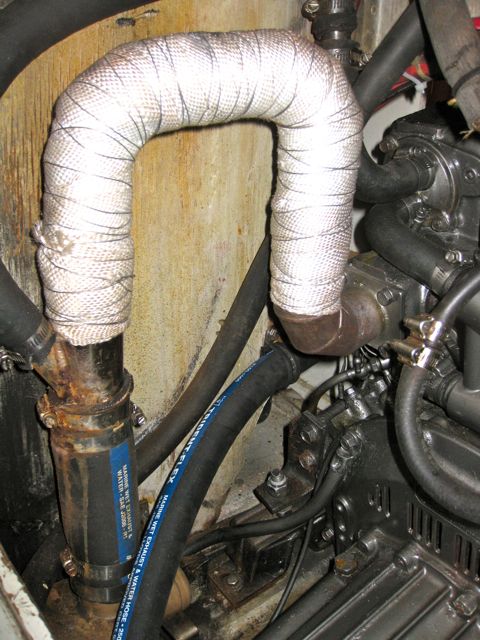 After consulting many websites and a couple friends I determined that the only way I would be able to solve these problems was to just take the darn thing apart and inspect it. That of course is always the easy part. Things always come apart easily (hint, hint!) Even though the hoses looked like they would require a lot of “convincing”, my patented method of hose release (run a “pick” around the hose to break the corrosion/seal) the thing actually came out pretty easily. After about half an hour I had it on deck for inspection. It looked surprisingly good. After I disconnected the short hose from the SS exhaust pipe, I saw that what looked like a potential internal catastrophe was really only a little bit of external corrosion pitting where the hose had leaked a bit over time at the hose clamp. I was able to polish the pitting out and bought some new hose and clamps. The inside of the SS exhaust pipe looked like new, albeit black with a light carbon soot, but no hint of corrosion. Here’s the system broken into it’s component pieces. Also, here’s a picture of the internal section of the system where the raw water injects into the pipe.
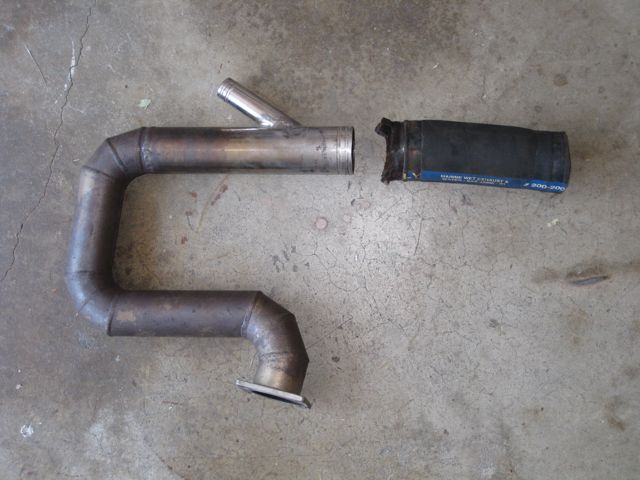
 So, after buying some new hose, new insulating tape and some SS wire to wrap the tape (suitably twisted and secured at each end, aircraft style), I was ready for the re-installation. (Note to self: next time wear long sleeves, long pants and a respirator when handling fiberglass insulation tape. The stuff floats everywhere in the air and itches!) As expected, what comes out never goes back easily. Getting the two bolts on the “far side” of the exhaust flange to go back in, when deep in the lazarette, squeezing my shoulders through the bulkhead and reaching over the transmission was a challenge. After much swearing and a half hour or so of grunting, dripping sweat, using one hand to support my body, the other to turn the bolt and my head strategically pushing the pipe so the flange would seat, the recalcitrant bolts finally succumbed. The rest was just tightening hose clamps to the muffler. But before I put the raw water hose back on the system, I used the dock hose to pressurize the raw water system and hopefully purge the airlock. A faint hope that the cure would be so simple, but worth a try. Took a bit to get the system pressurized but after spraying water all over the lazarette while squeezed cross-legged against the cabin wall, (note to self: wear foul weather gear next time) I finally got water to come out the other side. I actually think there might have been a blockage of some sort that I blew out because after tightening everything down and starting the engine, voila, the system worked and water came out the exhaust as it’s supposed to. Imagine that. A project that actually worked. Just to keep me humble though, the other two projects I was working on refused to comply, so for the weekend, I was only one for three. OK, I’ll take that.
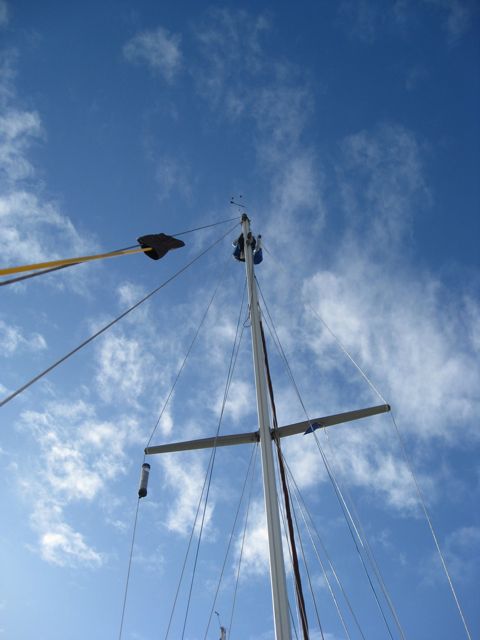
Up the Mast and Back Up the Mast
Bob sent me up the mast to fix the anchor light and the deck light. Unfortunately, the first time I went up, the safety knot in the halyard was in the wrong spot and I couldn’t get close enough to the masthead light. So down I went with an unsuccessful stop at the deck light (the new bulb didn’t fit) and back up I went to work on the anchor light. Of course, while I was up there, the cold south wind started blowing. Thanks to last year’s Christmas present from Jon & Heather (my own super deluxe climbing harness) and Bob’s handiwork at the winch, I have now safely summitted the mast five times. 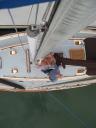

More Maintenance
The Fall (’08) maintenance schedule included replacing the two hatches, rehabilitating the hatch screens and keeping up with the brightwork. First the brightwork: The teak on Charisma is finished with Cetol, a semi-transparent coating similar to varnish. It’s more durable than varnish and easier to work with, but still needs maintenance. I’m finding out the hard way that when it goes, it goes fast. A fair amount suddenly started to peel this Summer. I got behind on it (preferring sailing to working) and now I’m having to strip some areas and completely refinish. The “eyebrow” trim on the cabin, all four dorade boxes, the companionway hatch cover, boom gallows and the forward hatch covers all needed the full treatment. This meant; tape the area off, strip (I used paint remover; oops. More on that below), sand, scrub with teak cleaner and then four coats of new Cetol. I used Te-Ka, a two part teak cleaner. Amazing stuff, but scary. Part one will stain anything including fiberglass. Part two is used to deactivate the agent in part one and lifts the dirt. Make sure everything is very wet when you use it and follow instructions carefully. I was able to Cetol the cockpit in time before it got too bad as well as the rails, but the Port side is suffering somewhat more (it faces the sun) and won’t look as good. I don’t want to refinish that until we’re in the boat yard at some future point since it’s awkward to reach while Charisma’s in the water. The good news is that if you get to the Cetol finish in time, it only needs one coat for maintenance and not sanding involved. Just dull it a bit with a scrubbing pad, wipe with Acetone and brush on a new outside coat. The bad news is; don’t ever, ever, use regular paint remover anywhere near fiberglass. It melts the gel coat off. Fortunately, I had taped off all the areas I was working on in case of mishaps, but there are a few small areas where the stripper went through the tape. Gel coat repair is going to be the next thing I’m going to be learning how to do (very minor, but I notice it). The one boo-boo was trying to sneak a last series of touch up coats of Cetol when I knew the fog was going to come in. I was hoping that it would dry enough before the fog actually made it to the boat. But when I came down the next day, I saw that the Cetol had “bubbled” where dew had gathered and sat on the deck. Given a week with better weather, the bubbles have gone away, but the area is “dull”, so I’m going to have to scrub it and give it a final gloss coat when it’s warm enough.  The new hatches. Shana and I gave each other a hatch cover for Christmas presents last year because the hatches leak when it rains. The originals are twenty years old and Lewmar no longer makes replacement parts for them, so new ones it was. Really nice “Ocean” series hatches. It’s so nice to be able to see through them now, but like everything else, it’s a time-consuming job. First remove. I thought that would be the hard part, but the old ones actually came off pretty easily. Then clean. A lot of old adhesive to clean up. Then tape, strip and sand and refinish the teak coaming that the hatches mount onto. Four coats of Cetol with 24 hours in between each coat means that this is automatically a week long job. Putting the hatch on means adding caulk (3M, 4000) which always makes a huge mess even with adhesive cleaner and the aforementioned tape on everything. But it sure is nice to hatches that; don’t leak, stay open where you put them and I like the new feature that lets you lock them open one inch, to help with ventilation.
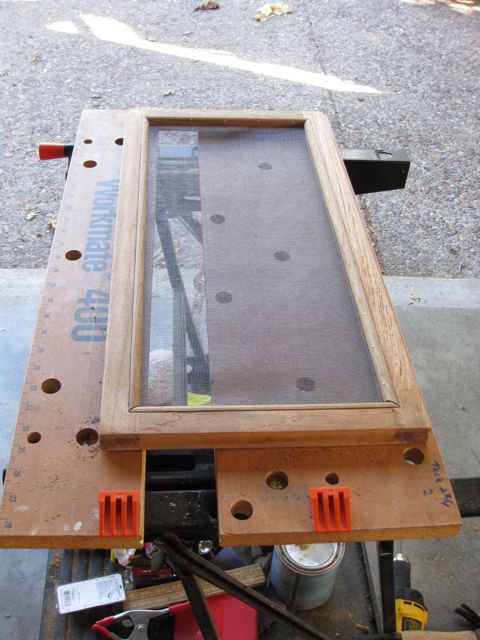
 The Tedious Stuff. As long as I was putting in the new hatches, Shana felt it was time to rehab the hatch screens which were torn, old and their frames were suffering from the hatch leaks (I was trying to ignore them knowing they would be a pain to fix). This meant taking them home, prying off the quarter round trim (which broke) and then stripping, sanding, etc the two frames that hold the screen (each is 2’x1′). Then off to the boat store for new screen, brass tacks and new teak quarter round. I was going to use brass screen, but ended up getting a fiberglass screen. It looks just like the old screen and is easy to work with. I just finished putting them back together and they look pretty good (picture below). As long as I was working on the screens, I figured this would be a good time to refinish the dorades. They were peeling pretty badly and I figured that it would be easiest and best to just bring them home and completely redo them. So, stripping, sanding…you know the drill, but I have to say they are going to look good. So, that’s certainly one thing about boats: they make you learn lots of new skills as well as how to work with toxic chemicals!
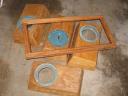
Cowl Vent
Here’s a picture of the cowl vents. We lost one and need a new one, so we don’t have to replace all four. 
Finally Back In The Water
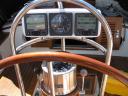
We’re back in the water and Charisma’s now officially in Berkeley! After seven long weeks Charisma is finally done. Going down to the boatyard every day and project managing the guys working on her finally got things done. We now have new rigging, halyards, lifelines, prop shaft, re-cut prop, bottom paint, replaced 20-year old holding tank hose, roller furling jib and new electronics. The new nav instruments are great. In the cabin, there’s my Garmin 396 showing graphically where we are plus coastal weather feeds and next to it is a B&G graphic display programmed to show boat speed, depth, and wind speed. At the helm we now have depth, boat speed and wind speed on one side of the binnacle, wind direction in the middle and a GPS feed showing speed over ground (to compare to boat speed), course and distance to waypoint and estimated time to waypoint. It’s all easily configured so we can change the feeds anytime we want from dozens of choices of data input. 

Yikes, March 25th And Still On The Hard!
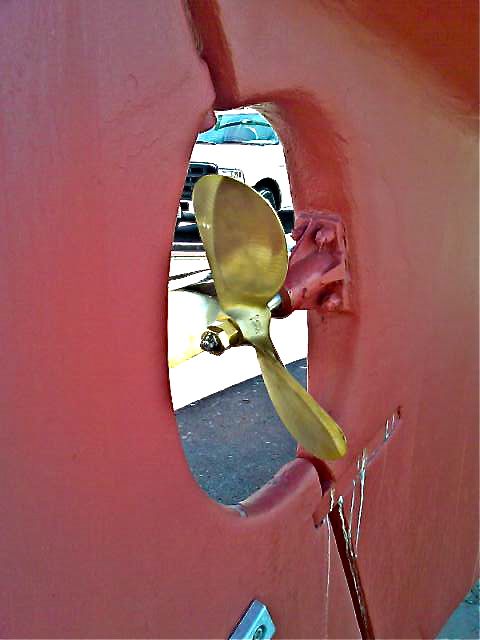
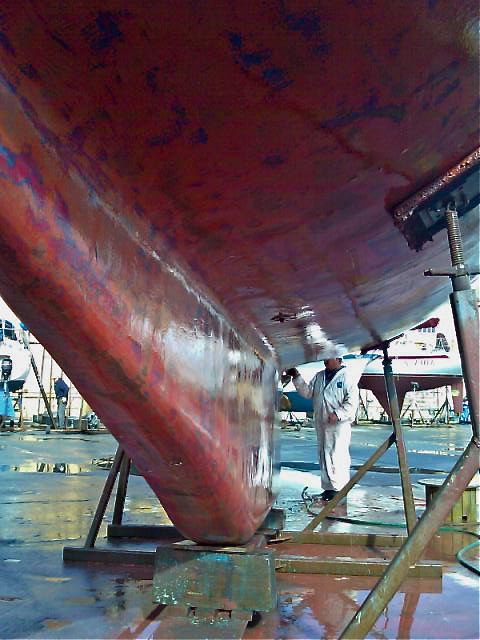
Who’d a thought we’d be out of the water for so long? Turned out the yard got busy and Charisma sat for over two weeks without any work getting done. So now, I go down to boat every day for an hour to supervise and make sure the yard knows I’m watching. They are finally getting things done. They are doing nice work too.A bonus I just found out is that we’re going to be able to hard wire the “portable” Garmin gps such that it will “talk” with the new instrument displays at the helm. We put in two Brooks and Gatehouse Graphical Displays at the helm in the hopes that eventually we’d be able to get gps data when we get a chartplotter (hopefully next year?). But in the mean time found out the Garmin will send the data just fine. So we’re adding a permanent gps antenna and wiring the garmin to a data unit that will send the info to the displays and to the new panel. Then we’ll be able to configure one display for speed and depth and the other display to show gps course and distance. In the center of the nav pod we also put an analog wind speed/direction gauge. We also put a “repeater” display over the nav table to we’ll have the same data down below. The “new” prop and prop shaft also went in today. Turns out the prop was probably too big, but the pitch was OK, so the shop ground it down to a smaller diameter. They took about 2 inches off, so now it’s a 16 inch diameter prop. Looks much better. I hope it performs as well as it looks. Also they said the shaft was “toast” (their words), so we’ve a brand new one. One final bit of good news is while digging in the storage compartments to run new wire, the electrician solved another boat mystery. He uncovered a strange looking pvc tube with numerous rope loops on it. Aha! The spreader bar for the sunshade! We have a sunshade with lots of attachments but no visible means with which to stretch it. I’ve been trying to figure out how in the world it worked. Mystery solved. Here’s a picture of the new prop versus the old prop. Not sure if you can see the difference in these photos, but now the blades have a better shape. 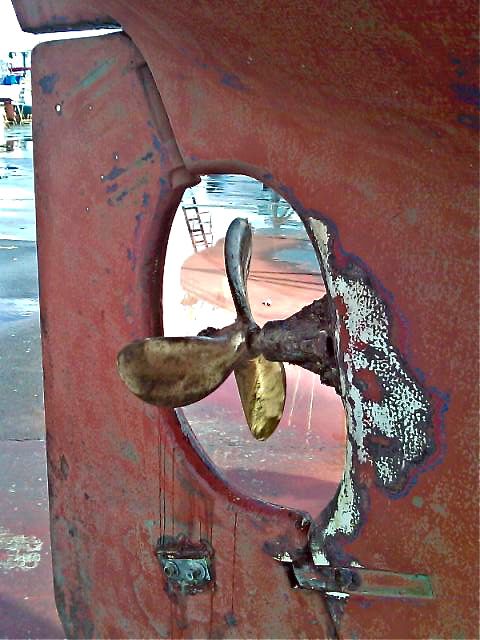
The Big One-Cont’d
Well, it’s March 10 and Charisma is still on the hard. I dropped by today (after a couple weeks of traveling) to see what progress has been made. They’ve had the boat for about three weeks now and the bottom paint is done, the head intake was fixed (an uncooperative clam had set up home and clogged the water intake). There’s a new diesel fill line (the old one was not rated for fuel), the inside is torn up as they’ve started with the new instruments, but just barely. I don’t think they have yet tackled putting in a new line to the holding tank. That will be a lot of work and I decided it better to leave that to the yard than to tackle it myself. The binnacle’s off in the metal shop being altered to accept the new instrument pod since-you guessed it-the new instruments wouldn’t fit in the old one. Also the prop’s off and the shaft was deemed “toast” so a new shaft will be part of the overhaul (extensive corrosion pitting likely due to the previous owner not sailing her enough). They have not yet started work on the new circuit panel. The old one had no more space for electrical “stuff”, so I’m having a new one put in to make additions easier. It will also begin the development of a real nav station in the quarter-berth as it will allow for installation of a new data repeater that will show speed, depth and wind and future adds likely to include GPS, Radar and SSB Radio. Lastly, the new rigging is not started yet since that’s not done until the boat is put back in the water. All in all, looks like at least another two weeks at the least. Probably just as well, since the garden needs attention anyway. 🙂 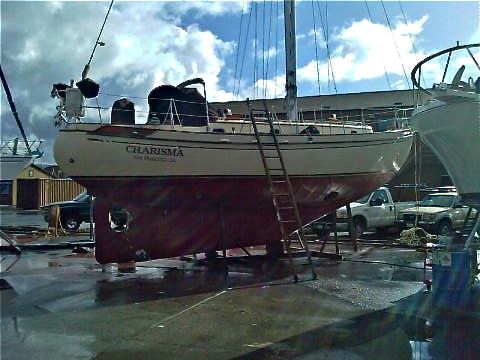
The BIG ONE
Yep, if we thought previous work was expensive, today I scheduled the big one. The haul out. Actually part of the purchase of Charisma included budgeting for some of what is to come.
- New standing rigging including a roller furling headstay and SSB backstay antenna
- New lifelines
- Running backstays (as a cutter rig, the staysail needs a bit of extra support. You can see the mast pump in a lot of wind. When we’re on the ocean pounding into 15 foot waves, I don’t want to have to worry about the mast!)
- New halyards
- New electrical wiring in the mast
- New masthead Tri-color
- New wind, depth and speed instruments
- Bottom sanded and painted
- New prop (mentioned in previous post)
And a bunch of other misc stuff. I’m going to do some work on the boat while she’s on the hard as well. The fun one should be installing the new gasket kit for the head. Ahhh, boat ownership is sooo glamorous! February 19 is the big day, but when we’re done, we’ll have solid new rigging to go with our overhauled diesel. The combination gives us the confidence that we’ve replaced “the big stuff”. Even though Charisma’s actually in great shape, she is after all, 20 years old and we want to make sure that her rig and systems are solid and ready for the next 20.
More Diesel
More Cowbell would have been cheaper. But diesel it was and January. Lousy time to sail, great time for maintenance. Mentioned a while back during the general maintenance of the engine that some more major issues were found. Even though the engine sounded and ran great, we wanted to have the engine as reliable as possible, so scheduled the needed fixes. One diesel mechanic and three days of full time work later, Charisma has a practically new engine. A real tear down. Both aft engine mounts were rusted out and it turns out, not actually holding anything down anymore. This necessitated that the rear of the engine get lifted so the mounts could be cut off and replaced. The air filter was corroded so off it came, and in the process it was discovered that the manifold had corrosion inside. Off came the manifold and a new one was ordered. The cooling system needed to be flushed and in the process off came the heat exchanger. It got sent out to be overhauled (cleaned and flushed). The original 40 amp alternator was judged too small for long term cruising, so guess what? Off came the alternator and a new 120 amp powerhouse was put in its place. I was hoping to fix the hot water heater hoses during this event (water system is heated by the engine), but discovered that a 20-year old hot water heater lasts about 19 years. Off came the hoses and plugs were substituted in the engine until a new unit is decided upon. After a few hours of watching all the stuff come off, coolant dripping on the floor, rust going in the bilge, mechanic muttering; “uh oh, this doesn’t look good”, parts stacking up everywhere, etc., I couldn’t stand the carnage any longer and went home. So…a few days and couple more boat dollars later a new corrosion-free, newly painted completely overhauled engine is now awaiting future adventures. Oh, did I mention that we found out the exhaust diameter is too small? Another project sometime this summer.